Thursday, September 15, 2016

Tutorial: How To Make A Stretchy Carseat & Nursing Cover

Stretchy carseat/nursing cover free tutorial!

You've all seen these awesome covers by now. They're amazing. And they're so easy and inexpensive to make! Follow these instructions and you'll be done in no time. You literally only have to sew 2 lines and you can make your own pattern with some copy paper.


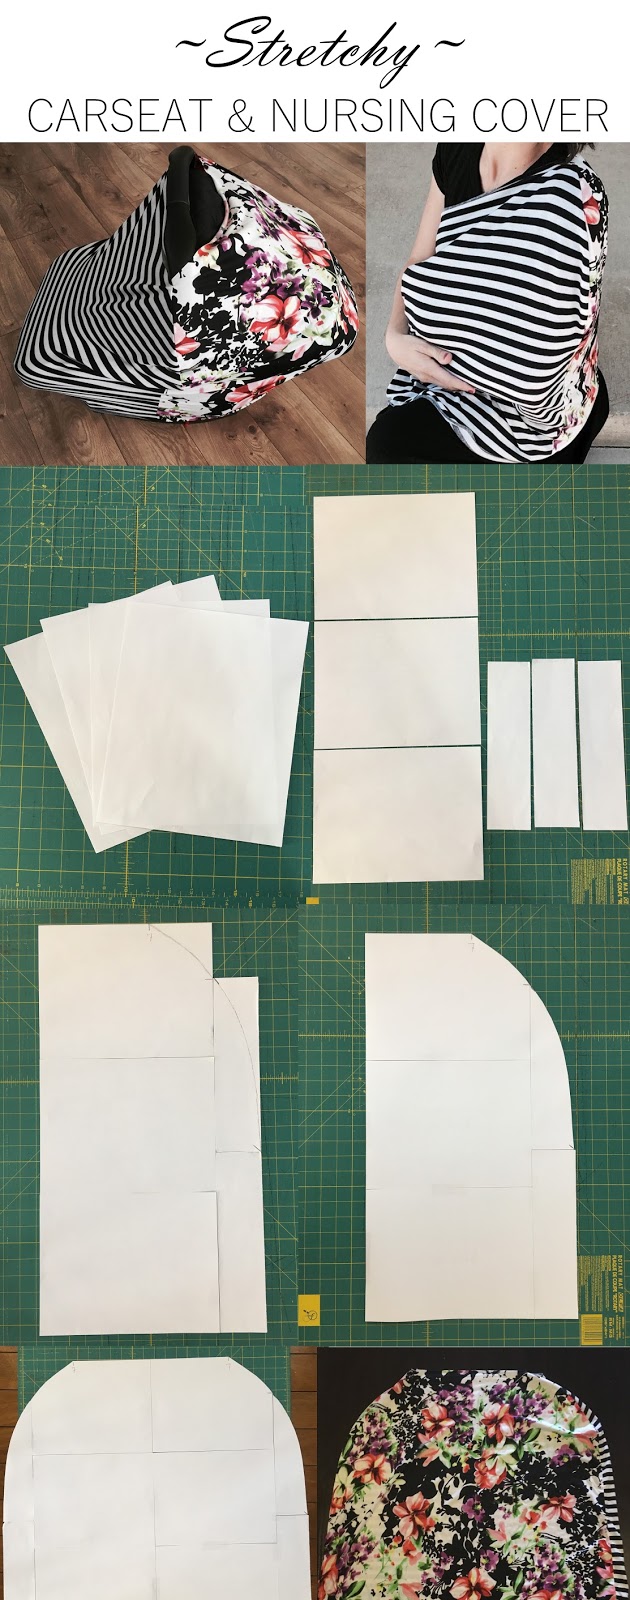
You need 1 yard of 60" wide jersey knit fabric OR 2 yards of two different 60" wide jersey knit fabrics if you like the combo look better (like my striped/floral cover). Doing it this way will make 2 covers. 

Don't forget to wash and iron your fabric before starting.

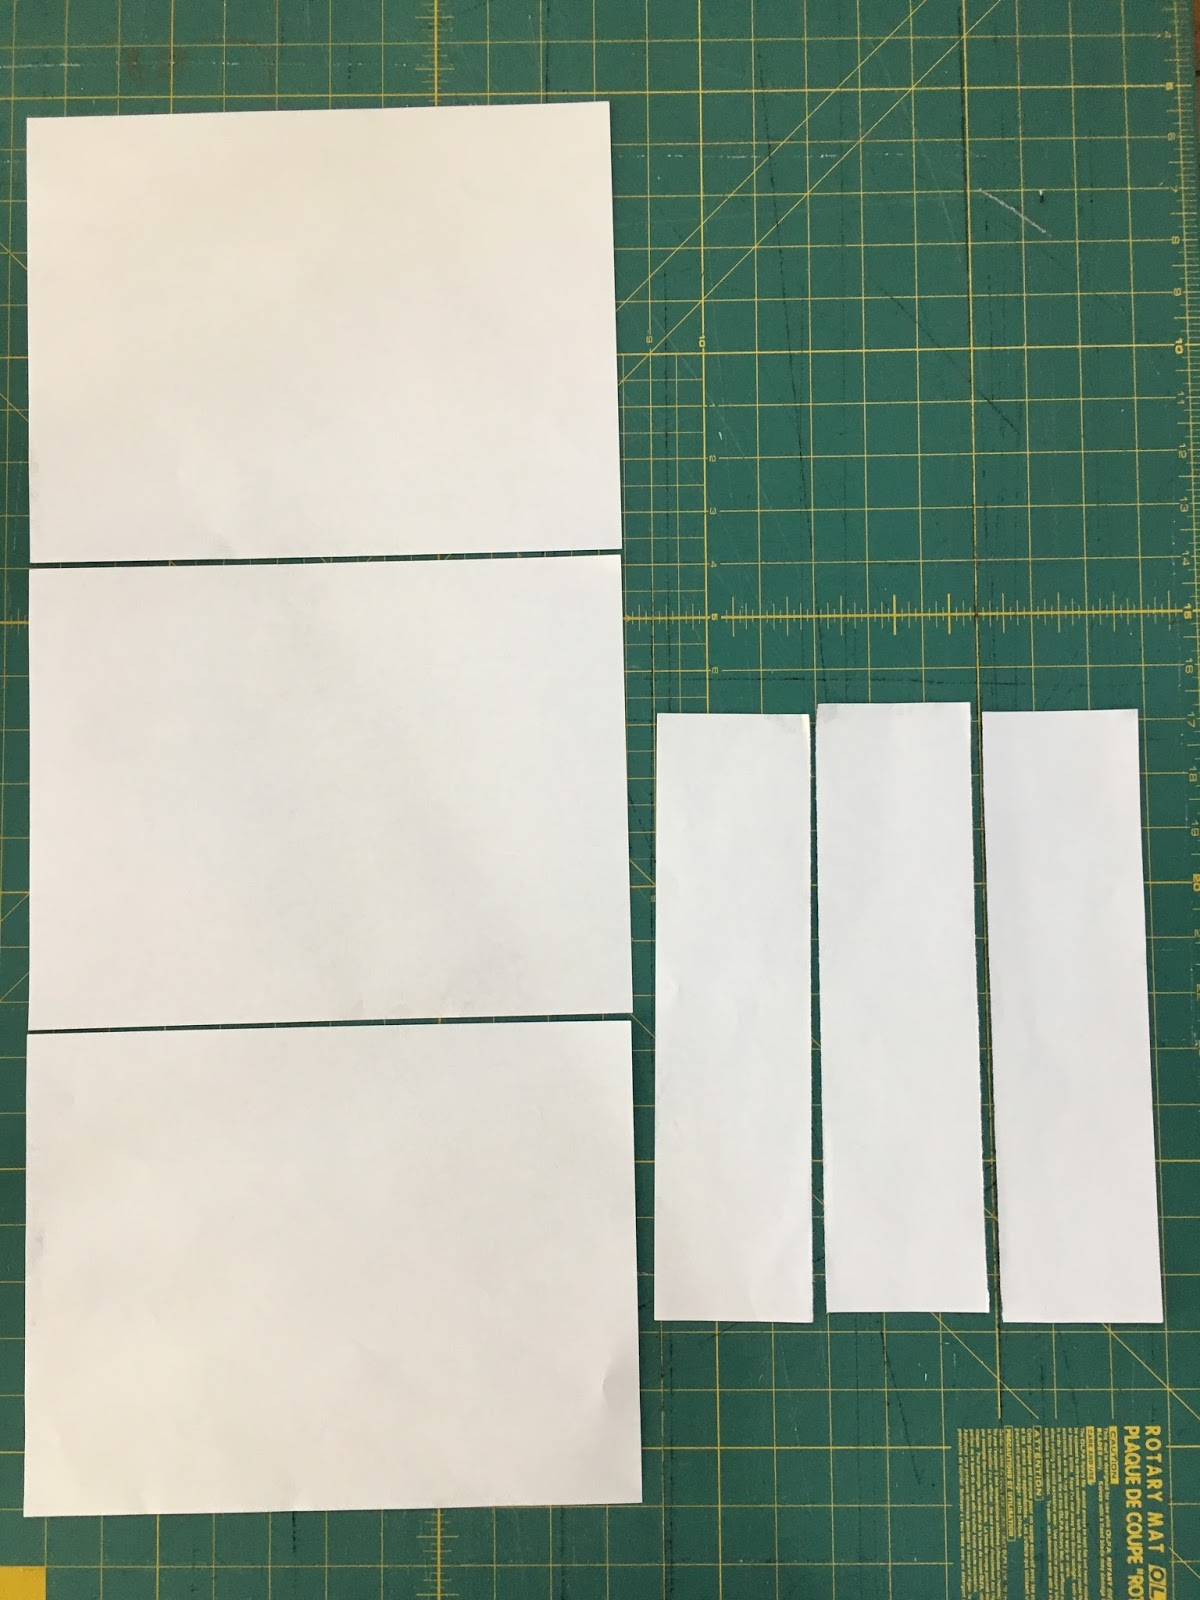
Now get 4 pieces of 8.5x11 copy paper

And line them up like this, cutting one of them into 3 equal parts


Lay them out as pictured. Measure and mark, then draw a rounded edge
You will mark 7" from the top left corner and then draw a curved line ending where the top papers meet at a 90 degree angle. Draw another curved line on the top right paper from its top left corner to its bottom right corner as shown.
Cut and tape pattern together

Repeat the steps above tracing your previous cuts as to get the same exact curve on the opposite side

Pin the pattern to your fabric and cut out 2 pieces; a front and a back. Now put your two pieces together with the right sides facing each other pin them together. Use pins to mark 7 inches from the center on both sides of the top line.  

Sew the cover all the way up the sides, leaving a 14 inch space on the top.

I leave the edges unfinished because they curl up and look just fine this way. Plus, I don't have a serger.

Voila! You have a handy dandy cover with like a hundred uses!


That floral/stripped one was a gift I made for a friend's brand new baby but the one below is one I made for my son who is now old enough to use it in highchairs and shopping carts.

I hope you enjoy making this! I love it when I can make something that is both easy and inexpensive and SO USEFUL! Not to mention cuuuuuuuuute. Hope you love it too!
  

Sunday, August 14, 2016

GIVEAWAY! 2 in 1 Carseat Cover & Nursing Cover


This giveaway is now closed

GIVEAWAY!!!


This giveaway is for a beautiful cover that can be used for nursing, for the car seat and more!

All you have to do is click HERE and vote for the "I forgot my soccer ball" video (by clicking the little heart next to it)! Each vote YOU cast OR YOUR FAMILY MEMBER OR FRIEND casts because of you (only one of you is entered, not both) is considered an entry and you can vote using any device (such as tablets, phones and PCs).

You have between now and Tuesday at 5:00pm MST to cast your votes. On Tuesday night please email me at aloadofcraft@hotmail.com letting me know how many times you voted and I will announce and contact the winner on Wednesday the 17th!

Thank you for entering! Good luck!!

This giveaway is now closed

Monday, November 10, 2014

Double-Sided Holiday Blocks

Remember my "Give Thanks" blocks here and my "Spooky" blocks here?

Well... although I described the fact that they were double sided, I never posted adequate pictures... so since the season is upon us and I had them back out of storage anyway, I decided to snap a few photos to better explain how totally rad they really are.

So here goes...

Here are the blocks and then how they look from behind

The "Give" block is the only one that doesn't have something on the back. I suppose you could put an exclamation point on it to read "Spooky!" if you wanted to utilize it. 

Wait, I know! You could also make two different words out of it like "Boo!" and "Eek" or maybe since Halloween is over you could turn the back of the Thanksgiving blocks into Christmas sayings like "Noel" and "Joy".

The possibilities are endless. What will your new reversible blocks say?

Kimono

I'm so in love with this 30 minute kimono tutorial from Babble!! I'm not sure what I like best about it; the look, the cost, the fact that it only takes a half hour or the ease of it. Seriously, I made some cuts, sewed a couple straight lines and I was done. No hemming required.

Awesome camera phone quality :/

I mean look at these picture instructions and tell me you can't do this:


In fact, I eliminated the first three (out of a whopping five) steps all together after realizing I could use a stay-stitch where the front slit ends (at the neck) instead of having a seam down the back. 

The kimono is very forgiving so don't stress out. As long as you use a knit, you can alter the length and front opening when all is said and done if needed.

LAST TIP:
In order to get perfectly symmetrical cuts in the front, I cut those FIRST and at the same time, before sewing. All I did was fold the fabric in half length-wise and cut both triangles at once from the folded edge. Test it out on a piece of paper if you are confused by how it will all fold and come together.

Very happy I found this. I will be busy making tons more of these! I have already made three and I'm dying to make one for my 5-year-old! When I do, I will be posting measurements here so stay tuned. 

Do you love this as much as I do!? Give it a shot!

Sunday, November 9, 2014

LDS Baptism Invitation (free download!)

This is the super cute invitation I "made" for my friend whose son is about to be baptized: 


I was REAL happy to find this adorable downloadable invitation that could be personalized:


Loving Life Designs was kind enough to make this available for FREE for anyone to download and it even comes in two other colors. All you need is Photoshop or Photoshop Elements and it's extremely easy to figure out, even if you don't really know what you're doing... like me!

Oh by the way, you might have noticed that I used a different font than she did. Instead of downloading the one suggested, I just used a font I already had called "Rosewood" but if you do want to download it, you can do so for free.

It's that easy folks.

LinkWithin

Related Posts Plugin for WordPress, Blogger...